How to Preserve Foods by Canning and Freezing
Here you get to learn all about how to preserve foods by canning and freezing, which is a popular kitchen skill being revived by modern health conscious and thrifty households.
If you think back to your younger years it probably seemed normal for grandma to grab a jar of jam or a jar of tomatoes that had been canned.
Canning and freezing is becoming more popular these days and with the help of this guide you can do it too.
This guide was created to help you learn the basics about canning and freezing.
From what equipment you’ll need to foods that can and freeze the best, this guide will teach you.
A Guide to Canning and Freezing
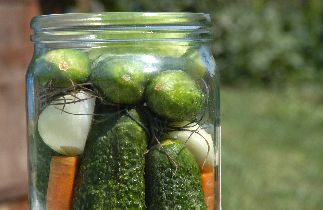
If you haven’t ever preserved food before, but are interested in canning and freezing, it can feel like a daunting task.
Even if you’ve done a little bit of canning and freezing before, it can be overwhelming if you haven’t ever made it a point to feed your family on these foods through the winter.
Hopefully, the short, basic guide provided below will help you get started.
What are the best foods to preserve and when should you preserve them?
If you enjoy produce, then you’re in luck because pretty much any type of produce can be preserved by canning and freezing.
You may think you have to have a garden, but you don’t.
You can buy the produce from the farmer’s market or the grocery store, but the fresher the produce the better they are for preserving.
Look for sales at the end of the growing season from your local farmers and at the grocery store.
Tomatoes and bell peppers are often on sale as they can be picked and ripe towards the end of September and farmers want to make some money with these still!
Buy the foods that are in-season and watch for sales to save the most money.
You can also freeze fish and other meats, so keep that in mind also.
What will you need?
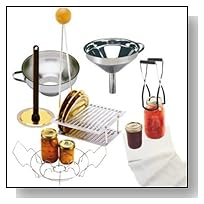
Here is a list of the basic items you will need for canning:
· Large tongs with rubber coating (aka: jar lifter)
· Wide-mouth funnel (needs to fit the jar sizes you prefer)
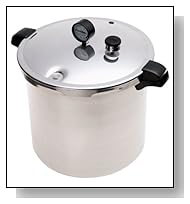
· Large, deep pot or pressure canner
· Kitchen timer
Below are the basic items needed for freezing:
· Wax paper
· Zip top freezer bags
· Cookie sheets/trays
· Ice cube trays (if you plan to freeze chopped herbs and/or purees)
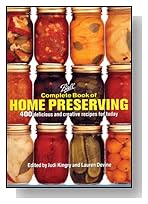
** A thorough book regarding how to can and freeze foods is also a great thing to have (and read) to get an idea for what you want to do before you do it.
Plus these books often have canning recipes in them also.
Essential Tips
· Sterilize everything by boiling for 10 minutes before using (tongs, jars, lids, etc.)
· Pressure-can low-acid foods. This will ensure the foods are bacteria-free.
· Use trays when freezing foods in plastic bags to keep the bags from sagging between the freezer shelves and freezing in that form.
Canning and Freezing: Why You Should Start
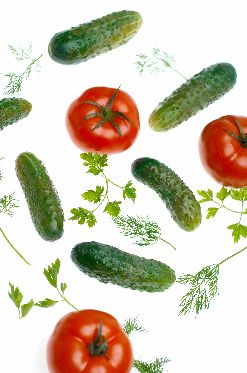
· Canning and freezing food are both time-honored traditions for preserving foods.
They are a little time consuming, but definitely have benefits that make the extra time worth it.
If you are considering starting canning and freezing your own food, but aren’t quite sure if the benefits outweigh the drawbacks, keep reading!
Below are the benefits you’ll receive when canning and freezing your foods.
· Keeps Money in Your Pocket
· When you start canning and freezing foods, you will want to buy the foods that are in-season because this is when they are the cheapest.
It doesn’t matter if you buy the produce from the supermarket or if you buy it from local farmers at the farmers’ market, you’ll save money buying them in-season.
Buy extra so you’ll have what you need in the near future, but also have plenty left over to can and freeze.
Then when the produce is out-of-season, you’ll have it on hand and won’t have to spend any money on it at the store, when the prices go up.
· Better Nutritional Benefits
· One of the best benefits associated with canning and freezing your own food is the fact that you know exactly what is in the jars.
When you buy canned and frozen foods at the store, you don’t have this luxury.
So, if you want your food to be canned/frozen with less sugar or salt, you have the power to control just how much goes in the jars when you do it yourself.
In addition, most people can foods in glass jars, which is better than metal cans because metal can find its way into the food…this doesn’t happen with glass.
· In addition, when you do it yourself, the processing time is a lot shorter as you don’t have to wait for it to make it to the supermarket’s shelves nor do you have to drive to the supermarket to pick it up!
Finally, foods that you can and freeze yourself don’t have all of the preservatives, artificial flavors and artificial colors in them those at the grocery store do.
· It’s Good Year Around!
· It doesn’t matter when you get the notion to eat strawberry shortcake or whip up some fresh green beans with bacon, when you can and freeze your own produce, you’ll have these items in stock no matter the season.
If you want these items and others like them (tomatoes, corn, squash, etc.) in the colder months, you’re going to have to pay a pretty penny for them…and they won’t taste nearly as good as yours!
·
Great
Christmas Gift Ideas
· A lot of people make their Christmas gifts while they’re canning their foods in the summer months.
For example, homemade jam and herbal vinegars are wonderful Christmas gifts to give to family and friends because they are inexpensive and usually well-received.
Which Foods are Great for Freezing?
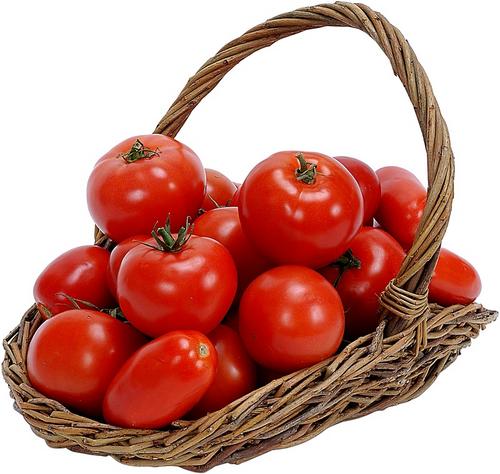
Freezing, like canning, is another preferred method for preserving food for many people.
Many people actually prefer freezing over canning because they believe it does a better job of preserving the freshness and nutrients within the food. In addition, it’s easier than canning.
So, which foods are good for freezing?
Cabbage
Yep, that’s right – you can freeze cabbage!
All you have to do is either shred or cut the cabbage into wedges and freeze in freezer zipper bags.
To draw the air out of the bag, insert a straw in the corner and zip the bag (while pressing air out) then suck the remaining air out through the straw and finish zipping.
Tomatoes
Tomatoes are another freezable food that often surprises people.
To freeze them whole, core the tomatoes and place on a cookie sheet in the freezer.
Once frozen, place in a freezer zipper bag.
You can peel the tomatoes before freezing if you wish, but once you thaw them, the skin easily peels off.
Another method for freezing tomatoes is to cook them and cut into quarters.
Then, simmer in their own juice in a covered pot until softened and cool.
Finally, freeze the tomatoes in freezer-safe jars or freezer zipper bags.
Green Beans
To freeze green beans you need to wash and cut off the ends.
Cut the beans to your preferred length or leave whole.
Blanch for approximately three minutes in a pot of boiling water, then put in ice water at the end of cooking.
Finally, drain and freeze in plastic bags.
Bell Peppers
Bell peppers are another easy food to freeze.
All you need to do is remove the seeds and stem of the bell peppers and slice or dice the peppers.
Place washed and cut peppers on a cookie sheet and freeze.
After frozen, move to a freezer zipper bag.
Berries
If you like blueberries, raspberries and/or strawberries all you have to do is wash them and place on a wax-paper covered cookie sheet and freeze.
Lastly, transfer to freezer zipper bags after frozen.
You can also freeze mashed or pureed berries in freezer safe jars.
Peaches
Freeze peaches the same way you do berries (there’s no need to peel first).
Apples
Apples can also be preserved through freezing.
Cut and wash the apples and place them in freezer-safe 2 cup glass jars.
Next pour one-third to one-half of filtered water over apples.
Leave at least an inch of space between the lid and the water to allow for expansion when freezing.
Fresh Herbs
Herbs are easy to freeze.
All you need to do is wash the sprigs and place the clean sprigs in a freezer zipper bag.
Make sure all the air is drawn out of the bag before completely sealing and freezing.
The Best Foods for Canning
Canning food is a practice that has been done since the 1800s and it has been proven to be a great way to preserve the foods we love.
However, a lot of people don’t know all of the foods that can be canned.
If you are interested in canning, but aren’t sure which foods are best for it, the list below will get you off on the right foot!
Wild Game
Believe it or not, many wild meats such as bear and venison can be canned.
Generally, the meat is either chopped or grinded first and then cooked, but it can be packed in raw also.
Tomato juice, broth and water are added next to fill in the space, but leave 1 ¼ inches of space at the top of the jar before sealing.
Chicken
Yes, you can also can chicken! However, the only safe way to can chicken is with a pressure canner because chicken is a low-acid meat.
The only way to make sure all of the bacteria is killed is to use a pressure canner.
When you can raw chicken, it is recommended that you pack the meat in loosely and periodically tap the jar against a hard surface to help the meat settle.
You don’t have to worry about removing the bones; simply cut the meat into pieces that will fit in the jar(s) you have.
Also, liquid doesn’t have to be added first if you can raw meat.
Other options for canning chicken include stewing or boiling the meat, followed by cutting the meat into pieces and packing it in broth together.
Always leave 1 ¼ inches of space at the top.
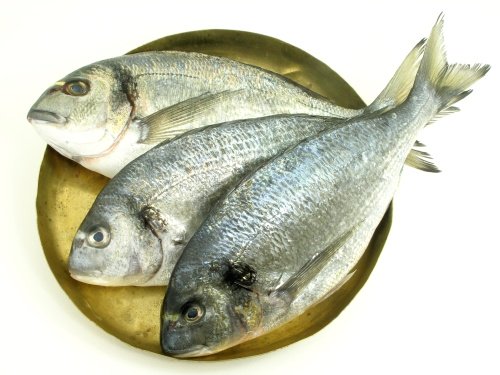
Fish
You may be surprised to learn that it is possible to can fresh fish!
Again, because of the low acidity levels in fish, you need to use a pressure canner to ensure the food is safe for consumption.
Fish is another meat that you don’t have to worry about adding liquid to the pieces.
All you have to do is place the fish in jars with the skin on (facing out).
Carrots
A pressure canner needs to be used with carrots because carrots are also low-acid foods.
You can chop, slice or place carrots in the jars whole.
You also have the option of whether you want to pack them in raw or steam them first.
Corn
Again, corn is another low-acid food so a pressure canner is needed.
One of the best ways to can corn is to pack it raw, add salt and fill with purified water (leaving 1 ¼ inches from the top).
Citrus Fruits
If you enjoy oranges, grapefruits, tangerines and other citrus fruits, you will enjoy canning them.
These are all high-acid foods so instead of using a pressure canner, a boiling water bath is all that you need to do.
Put the raw pieces in jars with a sugar syrup covering them (leaving 1 ¼ inches from top) and seal!
How to Can Different Foods

Believe it or not, there are a number of different ways to can food, not to mention thousands of different recipes to use!
The difficult task is deciding what method is the best one for you.
It is something you want to carefully consider because if you choose and incorrect method, your food may spoil or be unsafe to eat, which costs you additional time and money.
Below are a few types of canning methods to help get you started.
Pressure Canning
While many of our grandparents didn’t use pressure canners, it has been shown that pressure canning should be used for many types of food, especially low-acid foods because the high temperatures ensure the harmful bacteria is killed during the process, making the food safe for consumption.
Below are some of the foods that need to be canned with a pressure canner:
· Meat
· Fish
· Corn
· Asparagus
· Cabbage
· Potatoes
· Carrots
· Green Beans
· Spinach
· Kale
· Apples
· Peas
· Pears
· Beans (Kidney, Pinto, etc.)
Hot Water Bath
There are some types of high-acid foods that work great with the “hot water bath” method.
Basically, all you do is fill the jars with the foods and place in a deep pot, pour water in it and simmer for about 10 minutes, or whatever time your recipe states.
Below are some of the high-acid foods that this canning method works for:
· Citrus Fruits
· Berries
· Cucumber Pickles
· Pineapple
· Tomatoes
Freezer Canning
One of the quickest ways to preserve foods is to put them in freezer-safe jars.
It doesn’t matter if you want to put whole foods in the jar or pieces/chunks of food in the jar – you simply pour sugar-syrup, water or broth around the food and freeze the jars.
This method works well for pureed food too, simply cook the food down into a jam or sauce and freeze it that way.
Just make sure that you have about an inch and a quarter left for air space between the jar top and the food.
Below are some foods that freezer-canning works for:
· Corn
· Citrus Fruits
· Berries
· Meats
· Tomatoes
· Strawberries
· Homemade Salsa
Vinegar and Oils
Some people consider this canning and others do not, I believe it is a form of canning as it’s a great way to preserve some types of foods, as well as, spices and herbs.
For this method, you pour vinegar or oil around lightly-packed foods. Some of the foods you can “can” this way include:
· Garlic (Vinegar or Oil)
· Raspberries (Vinegar)
· Herbs like mint, basil, lemon balm, sage and rosemary (Vinegar)
Sauces
You have some freedom when canning sauces because they can be canned using a pressure canner, freeze-canning or a hot water bath!
Simply make your favorite sauce using one of your favorite recipes and can it!
Some popular sauces include apple sauce, tomato sauce, spaghetti sauce, salsa and pear sauce.
Tips for Preserving Foods through Canning and Freezing
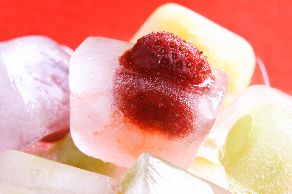
As you probably know canning and freezing are two popular ways for people to preserve the foods they love.
In addition, these time honored traditions help you save money and prevent waste also!
However, if you don’t know what you’re doing, it’s possible to ruin the foods you’re trying to preserve as you can and freeze.
Below are some tips to help you achieve success with canning and freezing!
Buy Fresh, Seasonal and Local if Possible.
When you buy foods that are in-season and fresh (they haven’t been sitting for a while), and come from a local farmer then you’re more likely going to get food with a higher nutritional value.
These foods are less likely to have been sprayed with chemicals and preservatives and haven’t had to make the long commute from the field to the grocery store either, making them a better quality of food.
Always Sterilize.
When you can food, it’s incredibly important that you sterilize everything first.
Always sterilize your equipment and make sure your recipe is current.
For example, if your recipe calls for a hot water bath, make sure that this is still an effective method for killing all the bacteria.
If not, you will need to use a pressure canner.
Blanch When Freezing.
If you prefer to freeze fresh foods, then consider blanching them first as this will improve your freezing success rate.
Basically, all you have to do to blanch foods is to dip them in hot water for 3-5 minutes, take the food out of the boiling water and immediately dip into ice water.
This stops the cooking process and many say it is effective in keeping the food’s taste, color and texture.
Check Out Sales.
If you notice some sales going on at your local grocery store, check into it, even if you don’t need the food right now. You can save money with sale items.
Canning and/or freezing these foods will ensure that you have them on-hand when needed and eliminate a trip to the store.
Get All Air Out.
It’s important that you get all the air out of the jars and freezer zip bags when canning and freezing.
For freezing, simply place a straw in the corner of the bag, zip the bag up to the straw, then suck out all the air in the bag.
Remove straw and seal. For canning, tap the jar on the kitchen table to get the air bubbles out.
Can/Freeze in Small Quantities.
It’s best to can and freeze items in small quantities. Why?
This helps eliminate the time available for bacteria to harbor as food dries.
Plus, the canning and freezing task doesn’t seem so overwhelming if you do a little at a time.
Get the Equipment.
The last thing you want to do is start a canning or freezing project and be right in the middle of it when you realize you don’t have all the equipment you need.
Therefore, get all the equipment you need out and sit on the counter before you start canning and/or freezing.
Invest in a Deep Freeze.
If you don’t have one and are able to afford one, you won’t regret investing in a deep freeze for the frozen produce you’re trying to preserve. Why?
The colder the temperature, the better it is for foods.
An individual deep freeze will allow you to adjust your temperature at a cooler rate than the freezer attached to your refrigerator will let you.
This will help your frozen foods keep longer.
Tips for Freezing Herbs
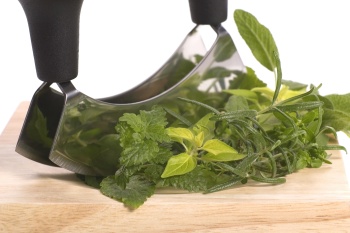
If you like cooking with herbs, then you’ve probably thought about how you can preserve them to make them last longer.
Freezing is a great option.
You may think the flavor will get lost when freezing herbs, but many herb-freezing believers say just the opposite.
Believe it or not, frozen herbs generally taste and act more like fresh herbs in recipes than dried herbs do…and you don’t even have to thaw them before using!
Below are some tips for freezing herbs.
Leave the stem on.
Yes, you can freeze herbs by placing the entire sprig(s) in a freezer zipper bag (single layer).
When sealing, suck all the air out with a straw.
You can double layer sprigs by placing single layers between individual sheets of wax paper too.
To use, all you have to do is break off a piece, chop it up and re-seal the bag!
Parsley is one herb that works well with freezing the entire stem since you use the stem and all when using parsley.
Freeze just the leaves.
There are some herbs that have hard or woody stems, making it best to just use the leaves in recipes.
In order to freeze these herbs, cut the leaves off first.
You may find it easier to use small freezer bags for re-sealing purposes.
Chop the herbs first.
You can also chop your herbs before freezing, if you prefer.
Place the chopped herbs in ice cubes, add a small amount of boiling water and freeze.
Once frozen, pop the frozen herb cubes out of the trays and places in a freezer zipper bag.
Harvest herbs at their peak.
The best time to harvest and freeze herbs is when they are at their peak…or in their best state.
Don’t wait until they begin to wilt or turn brown.
Also, if you are cutting them directly from your herb garden, cut them in the morning for the best results.
Make sure your scissors are sharp and you don’t smash the stem.
Should you wash herbs before freezing them?
This depends. If you have grown the herbs yourself or know they have come from a garden where no chemicals have been used on them, it’s okay to freeze them without washing them first.
However, if you suspect that chemicals have been used on the herbs during the growing season (or you don’t know) then it’s best to wash and dry the herbs before freezing.
Another idea is to blanch the herbs in boiling water for a few seconds before freezing.
Equipment Needed for Canning and Freezing
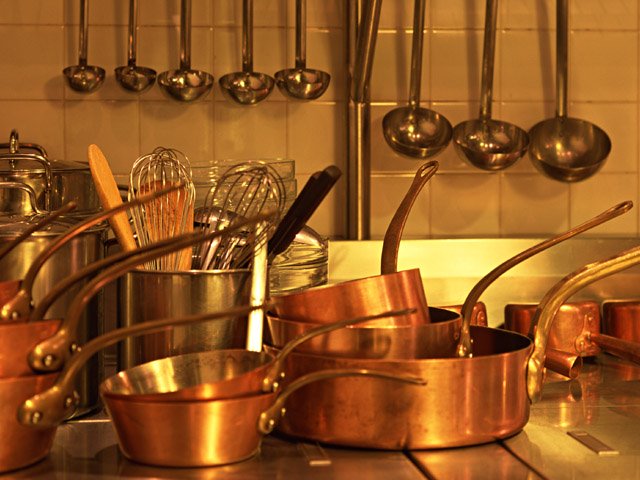
While it’s not difficult to can and freeze foods, there are some specific types of equipment that you will need to do it successfully.
Some of the equipment is necessary and other pieces are optional.
The good news is that some of the equipment can be used for both canning and freezing, making the investment worth it.
Below is a list of the equipment you need for both canning and freezing.
Freezing
· Wax Paper:
In order to prevent sticking, you will need wax paper to place the food on before freezing.
· Cookie Sheets:
Cookie sheets are needed to ensure bags of food don’t freeze between the bars of the freezer shelves.
Additionally, for certain types of foods, wax paper should be used to line the cookie sheets.
· Zip Top Plastic Bags:
When freezing non-liquid foods such as chopped veggies, berries and herbs, zip top plastic bags come in very handy.
Make sure to buy the freezer bags as these are specifically made for freezing.
· Glass Jars:
Another great way to freeze foods is with glass jars (Mason jars are wonderful)
All you have to do is add the food to the jar, liquid (if required by the recipe) and leave a little room for expansion (1 ¼” – 1 ½”) and then put in the freezer!
· Separate Freezer:
While any freezer will work to freeze food in, if you plan to do a lot of freezing, then you will want to get a separate freezer specifically for your preserved (frozen) foods.
Another benefit of having a separate freezer is the ability to set the temperature lower than you can with the freezers attached to refrigerators.
Canning
Below are some of the pieces of equipment you’ll need when canning foods:
· Pressure Canner:
Low-acid foods need to be canned with a pressure canner to ensure the food is completely sanitized and all bacteria are killed.
Pressure canners are able to cook foods at a higher temperature than boiling hot water, which ensures more germs/bacteria are killed.
· Glass Canning Jars:
The most preferred glass canning jars are Mason jars.
These jars come in quart, pint and even one cup sizes. The wide-mouthed jars are generally the best ones to use.
· Wide-Mouth Funnel:
Canning can be messy as you will be pouring liquids from a pot to a jar. In order to save yourself a lot of time, stress and mess, it’s recommended that you use a wide-mouth funnel.
· Rubber-Tipped Tongs:
Rubber-tipped tongs make lifting glass jars out of pressure cookers a breeze…and safe!
They need to be rubber-tipped to ensure a good grip on the jar is achieved.
The Pros and Cons of Canning and Freezing
Every year, a lot of people can and freeze foods to ensure they have the foods they love on hand when winter rolls around and they are out of season.
You may be wondering which method is best for preserving food.
Well, there are pros and cons associated with both canning and freezing, so let’s look at both of them.
Freezing
Pros:
· Simple:
Freezing foods is not nearly as complicated as canning is as you don’t have to worry about long cooking times or sterilizing containers.
· Equipment:
Because freezing is such a simple way to preserve food, the type of equipment you need is limited to cookie sheets, wax paper, freezer zipper bags and a freezer.
You can also freeze some foods in Mason canning jars too.
· Longevity:
While freezer burn occasionally occurs, freezing foods often keeps food in edible condition for the entire time it’s in the freezer.
· Safer:
When you freeze foods, you don’t have to worry about long boiling water baths or using a pressure canner, making this also a safer method for preserving foods.
Cons:
· Affects Texture:
Freezing foods does affect the texture of the produce being frozen due to water swelling during the freezing process.
Basically, because most produce contains a lot of water, the water inside the produce expands as the produce begins to freeze.
Sometimes, this can cause the cell walls to burst, resulting in “limp” produce.
· Takes Space:
Many people who freeze food have a separate freezer to put the food in, but if you don’t then you’ll notice a lack of space due to the foods you’re preserving.
· Electrical Concerns:
One issue you run into when freezing foods is losing your preserved foods if the power goes out for long and the freezer begins to thaw.
Canning
Pros:
· Storage:
Storing canned goods is easy because you don’t have to have a particular place to store the foods (like a freezer).
Instead, you can store the foods in a cellar, pantry, basement, etc. and if the electricity goes out, there’s nothing to worry about.
· Freedom:
Canning your own foods gives you a lot more freedom as you are able to choose the ingredients, and amounts used, that go in the jar with the foods you’re canning.
You can also mix and match foods (think green beans, corn and carrots) that you may not be able to buy at the store too.
Cons:
· Equipment:
If you do much canning, you’ll find that it’s essential to have a pressure canner, which aren’t cheap.
You will also need additional tools like a wide-mouthed funnel, tongs and Mason glass jars.
· Nutrients:
Some experts believe that the process of canning foods (cooking and heating) destroys many of the nutrients within the food. In contrast, this doesn’t happen with you freeze foods.
· Safety:
Safety is a con here because it’s much more difficult to be safe when canning foods.
Not only are you working with pressure canners and boiling water baths, but you also have to make sure the food is cooked well and safe before canning.
Additionally, you must sterilize your canning equipment before each and every use too.
Tips for Using Canned and Frozen Foods
So, you think canning and freezing foods may be something you’re interested in because not only will the practices help you save money, but these foods are also healthier than the preserved foods you buy at the store.
However, you don’t know what you can do with the frozen tomatoes, canned corn and other foods you plan to preserve.
Below are some ideas to help you get started.
Frozen Fruits –
There are many things you can do with frozen fruits including using them for ice-cream toppings, adding them to yogurt and making sauces with them to use over various types of meats.
You can also make some pretty great fruit smoothies with frozen fruits too.
Here are some recipes you might enjoy.
· Frozen bananas, wheat germ, peanut butter and vanilla nut milk
· Frozen strawberries, unsweetened cocoa powder, vanilla almond milk and ground flax
· Frozen raspberries, grapes and blueberries mixed with unsweetened apple juice
Frozen Veggies –
Frozen veggies can be used for a number of things such as pizza toppings, soups, side dishes and much more.
If you like soup, then you may be interested in the recipe below.
Ingredients
· 1 quart chicken broth
· 1 pint frozen tomatoes (or 2 large whole tomatoes, frozen)
· 1 pint tomato juice
· 1 pint (2 cups) frozen green beans
· 1 pint frozen corn
· 1 cup frozen carrot slices
· 1 cup frozen cooked lima beans
· 2 cups shredded chicken
· 1 medium onion, chopped (fresh or frozen)
· Salt and pepper to taste
Directions
Place all ingredients together in a large pot and bring to a boil. Reduce heat and simmer for 45 to 60 minutes.
If necessary, add water.
Canned Fruits –
Canned fruits are great for things like fruit salads, homemade pies and cobblers, yogurt and ice-cream toppings and even jello salads. Y
ou can also spoon your favorite canned fruits over shaved ice for a cool, healthy treat.
Canned Vegetables –
Again, the options are endless for canned vegetables.
One of our family favorites is green beans and onions.
Here’s how you make them:
Ingredients
· 1 quart green beans (canned)
· 1 small chopped onion
· 1-3 strips of bacon
Directions
Take the bacon and fry until crisp in a large skillet.
Remove bacon and save one tablespoon of bacon fat.
Next, sauté the onion in the saved grease for approximately 2-3 minutes, add the green beans next.
Finally, crumble bacon over the green beans and serve.
If you have canned some whole baby carrots or sliced carrots, take a quart and drain the liquid.
Place the carrots in a casserole dish (shallow), add one or two teaspoons of sugar and a half teaspoon of salt (if you left the salt out when canning).
Cut small pieces of butter and place on top of the carrots throughout the entire casserole dish.
Bake at 400 degrees F (uncovered) for roughly 20-30 minutes.
Important!
Processing Times
It is imperative that you research the processing time and procedure for each and every individual food that you wish to pickle.
Certain fruits require different methods as compared to certain vegetables.
Varying amounts of salt and water or vinegar are required as well in order to keep microorganisms at bay.
Continue to Research
Now that you have finished reading this report you should have enough information and knowledge to get started.
You’ve learned about the foods that will can and freeze best as well as tips on how you can freeze herbs.
You’ve also learned about the different equipment needed for your canning and freezing needs as well as some pros and cons of canning and freezing.
And you even learned some tips about how to use your newly canned and frozen foods.
So, what are you waiting for? Don’t you have some canning and freezing to get started?
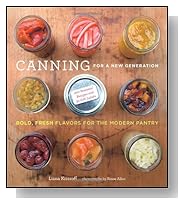
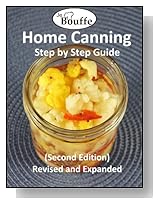
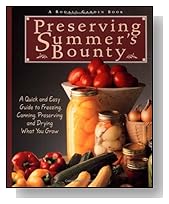
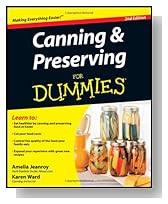
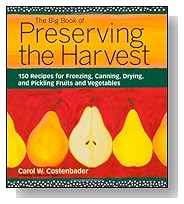
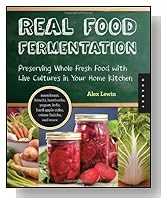
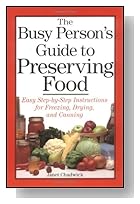
Below here I'll feature some of the most popular guides you can buy online that show you how to preserve products one by one:
More Resources
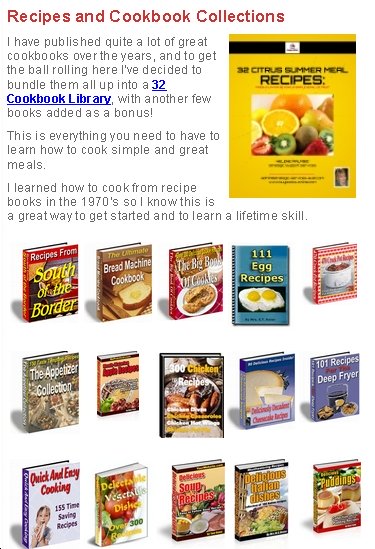
My incredible collection of cookbooks includes recipe books for jams and preserves, so check them out below:
Following directions regarding how long to process and what additives such as salt, water, red or white vinegar, honey, or even syrup will ensure proper safe pickling as well as tasty results.
With a little research and some planning, you can begin to pick and choose which vegetables are best for your personal taste.
You can get some great online resources to help you in your food preserving, and over time I'll be featuring some of the most useful and popular items here.
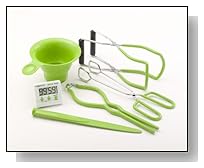
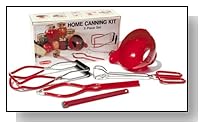
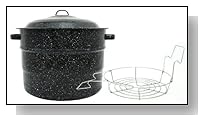
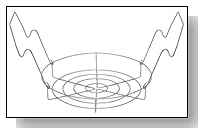
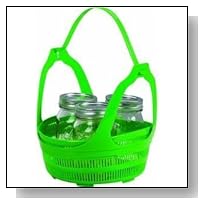
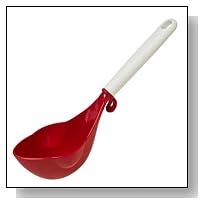
Here are some of the most popular canning supplies that you can order online and have conveniently delivered to your door.
Below here I'm featuring more pages with helpful how-to-do-it tips on how to preserve foods by canning and freezing.
Feel free to submit your own story or article about it, and I will create your own page here with your contribution for the community to read.
More Tips for How To Do It Yourself: Cooking & Recipes
Do you have a tip you want to contribute here? Share it!
Read the latest updates & rest of the how-to tips here:
Click the Title links below to see the latest how to do it tips and contributions to this page...
Popular Ways to Dry or Dehydrate Fruits and Veggies
I love, love, love to have a fully stocked Pantry ... opening the door to see shelves of preserved foods and produce.
Dried fruits are a wonderful way …
Freeze-Ahead Meals and Sauces
Have you ever wished you could fill your freezer with meals that are already prepared and ready to heat and eat?
Oh, yeah, those are called TV dinners, …
Freezer Friendly Fruits and Veggies
Preparing foods ahead of time makes it possible for you to save money on your grocery bill. You can find fruits and vegetables on sale during the summer …
How to Choose Which Fruits and Veggies to Store
An overabundance of fruits and vegetables from your garden means you may have a problem. What do you do with all the extras?
Some of it you will want …
Storing the Harvest: Ways You Can Preserve Your Fruits and Veggies
It’s that time of year again. You have a bumper crop of certain fruits and vegetables in your garden, someone has shared their bumper crop or you’ve made …
Tips and Tricks for Freezing Foods to Preserve
When it comes to saving time and money, there is no better place to start than right in front of your freezer.
Food bills and prices are soaring and …
How to Keep Food Canning Sanitary
Once you have made the decision to try canning and preserving, it is important to be aware of how to keep canning sanitary.
There are several methods …
In a Pickle: How to Preserve Vegetables
The art of pickling has been around for centuries and used as a way to store summer harvest for long winter months.
Pickling uses the process of adding …
Things to Consider When Drying Foods
There are many ways to preserve foods and drying is one of the easiest and tastiest around.
Just as there are several ways to preserve foods, there …
3 Ways to Preserve Foods Without Canning or Freezing
Preserving food has been around for many centuries. While, of course, there are the methods of canning and freezing, other lesser known methods are just …

"Power Tips" magazine is back!
You Get A Free Complete Self Help Report delivered to your email box every edition, plus you get a free PLR article and other great gifts!
SUBSCRIBE BELOW ... I promise you will want to USE what you learn!
I really want to know what you think of this site, this page, and to hear your tips or suggestions about it.
So please share your story or simply add a Comment in the comment box.
If you feel that the information on this page has been useful to you please give it a Like or share it with your friends - thanks!!
"You are a life Saver!!
I recently discovered this site and I can tell you that my life has not been the same. I now come here EVERYDAY and spend at least 1 hour.
I used to spend that time browsing online fashion and beauty
magazine which just means that I spend more. Now I have replaced that
habit with coming here.
In future I will think about contributing articles as well. Thank you! Thank you!! Thank you!!! and God bless"
Contact Us | About Us | Terms of Use | Privacy Policy | FAQ | Testimonials
Amazon and the Amazon logo are trademarks of Amazon.com, Inc. or its affiliates. As an Amazon Associate I earn from qualifying purchases. Product prices and availability are accurate as of the date/time
indicated and are subject to change. Any price and availability
information displayed on [relevant Amazon Site(s), as applicable] at the
time of purchase will apply to the purchase of this product.
Back to HOME PAGE of this how to preserve foods by canning and freezing section of the site.






New! Comments
Have your say about what you just read! Leave me a comment in the box below.